Top 5 Adobe Premiere Pro Lesser-Known Features
With digital content more important than ever, creators of all skill levels are looking for ways to bring their work to the next level. Whether you use Adobe Premiere Pro for your job or hobby purposes, there are always new updates and features being added right under your nose. Maximize your time and skills with these 5 Adobe Premiere Pro features you might not be aware of.
1. AI-Powered Auto Reframe Tool

Has science gone too far? Automated editing features are becoming ever more prevalent in photo and video editing tasks. A little while back, Adobe released an update for Premiere Pro called Auto Reframe which automatically pans and scans your content to fit a variety of aspect ratios and resolutions. Manually reframing and cropping your content for social media platforms can become very time-consuming, especially with high energy and cut-heavy timelines. Powered by Adobe’s Sensei AI technology, Auto Reframe analyzes your selected timeline and intelligently reframes it into cinematic 16:9, vertical 9:16, or square 1:1. All the while it keeps your subjects (humans, animals, objects) within the frame… mostly. Other than video footage, this feature can also handle any type of titles and motion graphics. They are also seamlessly resized to fit the new aspect ratio.
Nothing is perfect, and there are times where the reframing and track are not correct. Luckily, you can go into the effect settings and manually reconfigure the keyframes to your heart’s content.
2. Audio Track Mixer

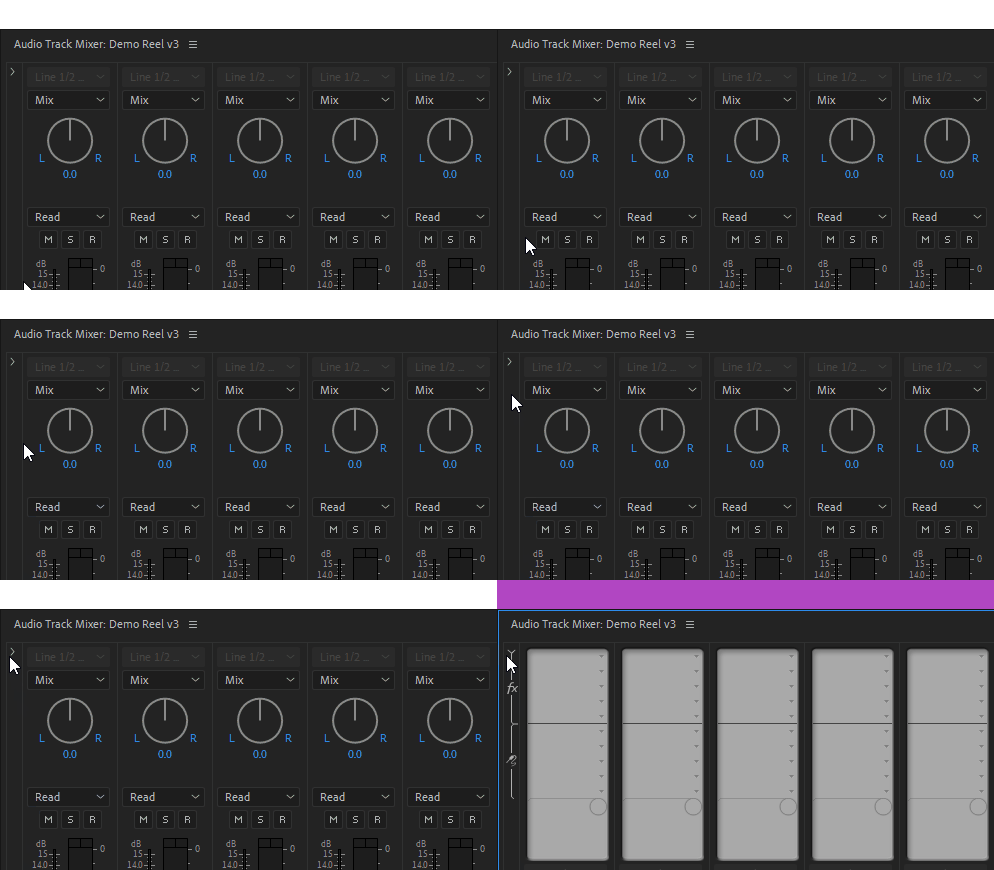
Though Premiere Pro is a video-focused product, the sound is just as important. This tip will be no surprise to those who are familiar with DAWs like Ableton Live or Adobe Audition. In Premiere Pro you can add your favorite VST audio plug-in software onto a track in the audio mixer or on a clip. Whether you have an ambient track that is not guttural enough or an interview that has rollercoaster looking waveforms, external plugins may help in a way the default Adobe plugins may not. Already have some plugins installed? Make sure they are active. In Premiere Pro go to [Preferences > Audio] and click the [Audio Plug-In Manager button]. Check if it is pointed at your plug-in folders and press [Scan for Plug-Ins].
3. Automatic Scene Detection

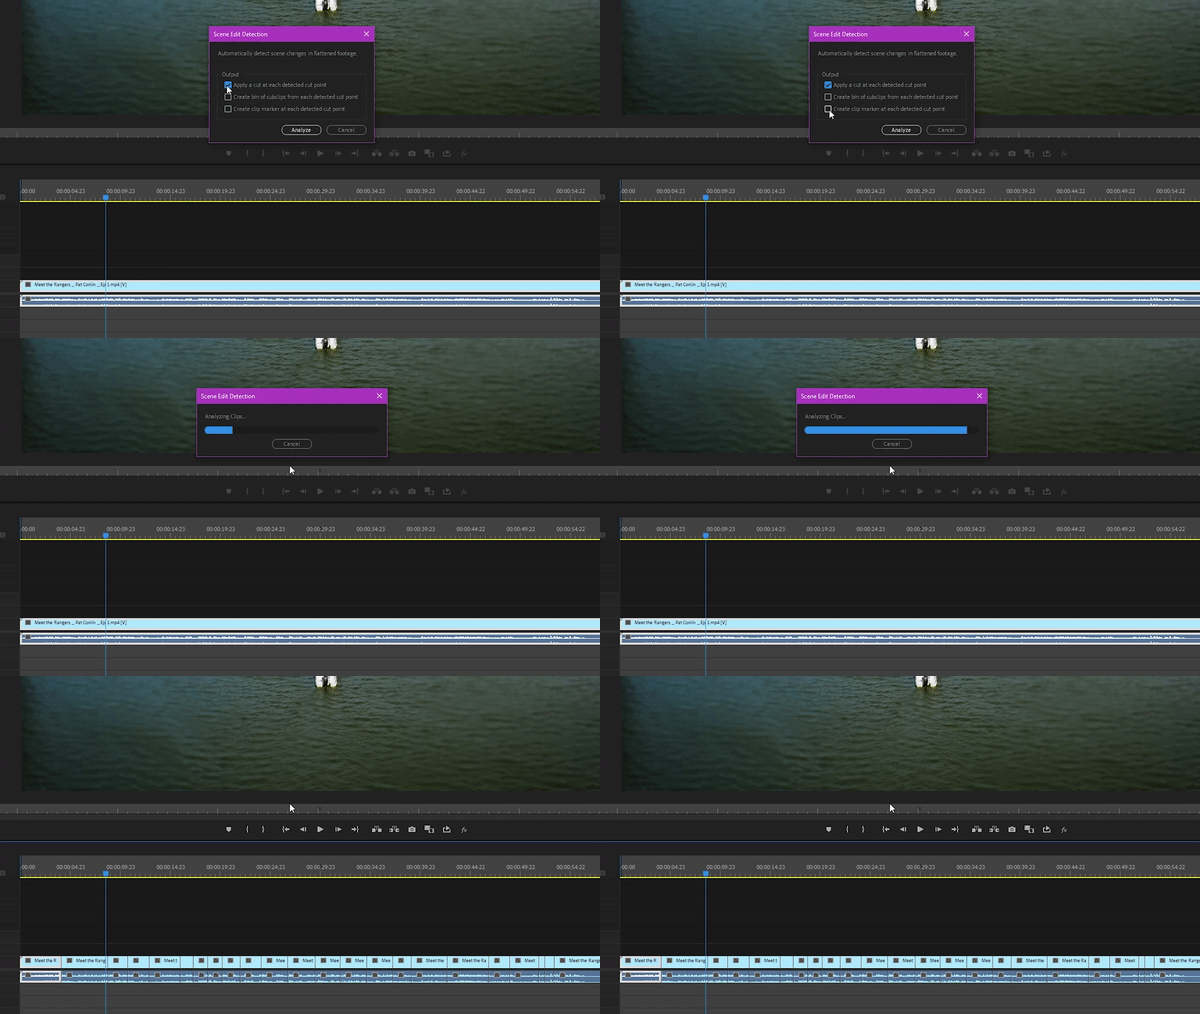
Have an already baked or edited video that you need to recut and do not have the project file for? Automatic Scene Detection is your answer. Similar to the AI-Powered Auto Reframe tool, Automatic Scene Detection will find cuts or scene changes and give you the option of applying direct cuts at the detected points, create sub-clip bins of the detected cut points, or leave markers for manual review. Once again, this is a time-saving option for those who do not have the time to review longer, already baked video files.
4. Master Clip Effects

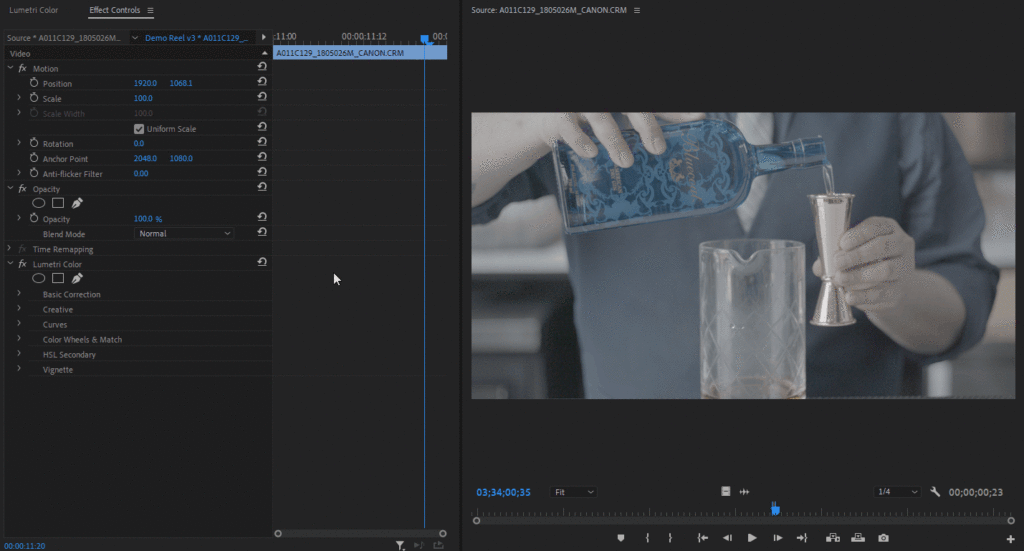
If you have used Premiere Pro semi-regularly, you probably have added effects to a single clip or sequence before. You may or may not know that you can also add a blanket effect to the master/parent clip. When you apply an effect to a master clip, the effect automatically ripples down to all sequence clips (child clips) created from that master clip. The user interface does not make it immediately obvious but take a look at the animation above if you need a visual aid.
Bonus: You will also find raw processing options here if you have shot footage in formats such as ProRes RAW, Blackmagic RAW, Cinema RAW Light, REDCODE Raw, ARRIRAW, etc. Though if you are shooting in these formats, you likely already know this!
5. Quick Export

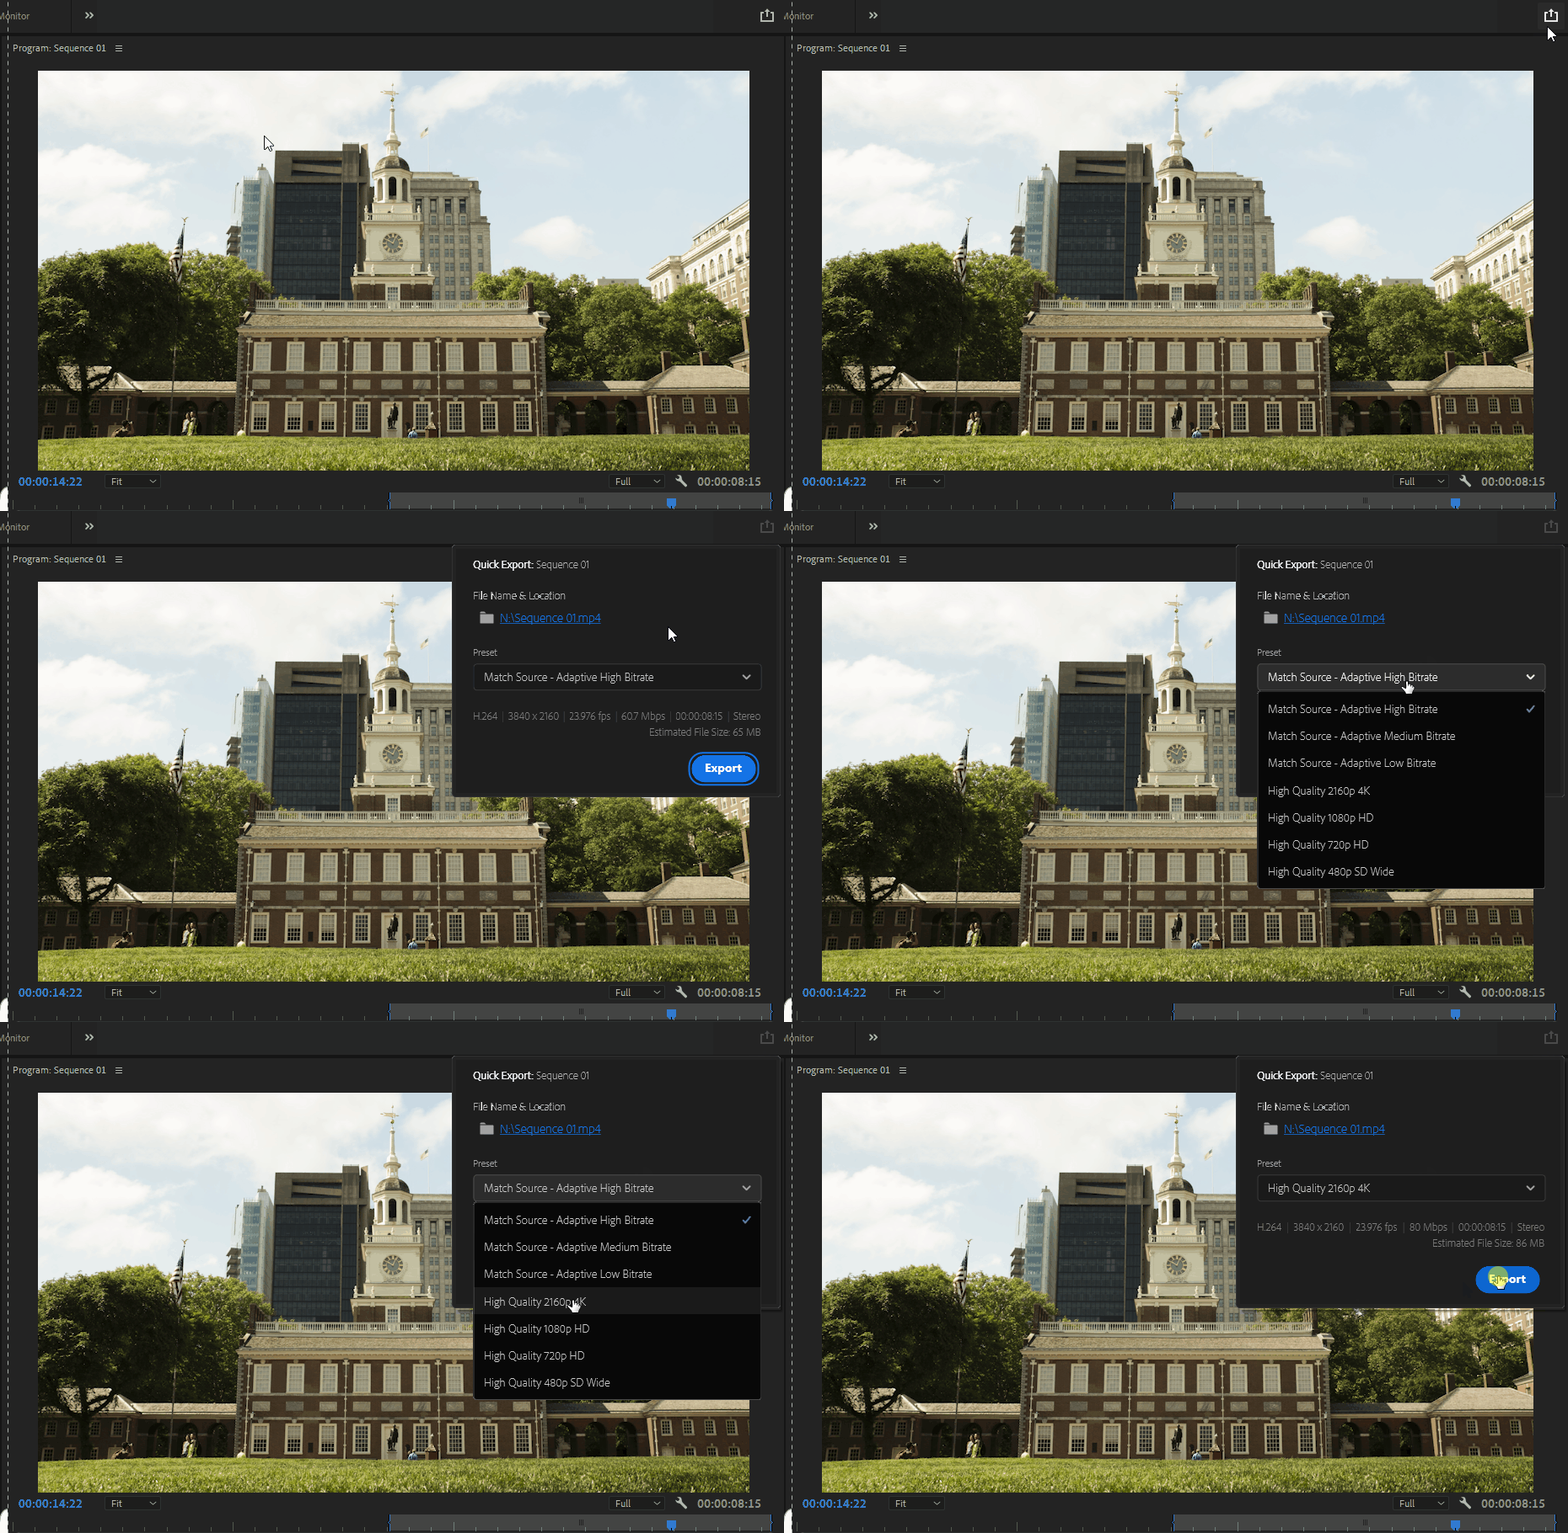
You may have noticed an additional button added to the top of Adobe Premiere Pro’s user interface. Depending on your workspace configuration, in the default interface, you will see a share-like button towards the top right of the program monitor. This allows editors to work more efficiently by providing direct access to frequently used export settings. It will render depending on your selected in and out points in your timeline.
Let’s Recap
So does this mean that you should be using every one of these tools? No. These features should be used on a project and personal preference basis. Take a look at the pros and cons for each feature below.
- AI-Powered Auto-Reframe Tool
Pros: Saves you a boatload of time, does most of the reframing dirty work for you.
Cons: You should always check the AI’s work, as it is not perfect (yet). At times you will need to go into the effect settings and manually reconfigure some shots. - Audio Track Mixer
Pros: Unlimited creativity with sound design and manipulating existing waveforms in your timeline.
Cons: Expect significant CPU usage increase when using multiple plugins (your mileage may vary, try to stick to individual tracks instead of clips). - Automatic Scene Detection
Pros: Saves you a lot of time and is accurate and fast in detecting scene changes and cuts.
Cons: Should always have its results checked for accuracy, may have trouble with motion-graphic heavy files. - Master Clip Effects
Pros: If the footage you are editing is light-controlled and consistent (such as an interview), throwing effects on the master may save you some time on the color grading end.
Cons: Depending on the type of content you are editing; it is almost always better to color grade and polish footage on a clip-by-clip basis. This allows for more creative control if there is a deviation in the lighting in the clip or environment. - Quick Export
Pros: Great for sending a quick clip to a client or for quick reviewal.
Cons: Limited codecs and rendering options.
 Get In Touch